How to move your My TimeBook history into DockBook
You can move your whole My TimeBook history into DockBook in a few minutes, and you don't have to start your book over to switch. If you've been logging shifts for years, that record is worth keeping.
The process is different on iPhone and Android, because My TimeBook exports differently on each. Both are covered below. Pick yours.
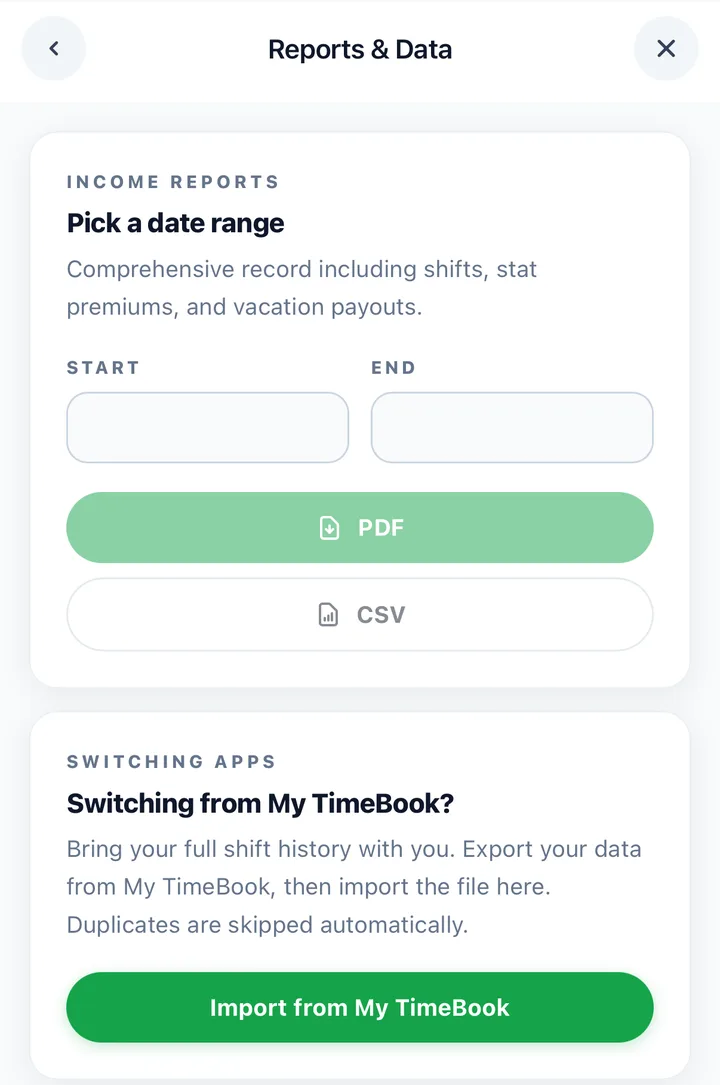
Where the importer is in DockBook
Open the menu, tap Reports & Data, and look for Switching from My TimeBook? Tap Import from My TimeBook. DockBook walks you through the steps on screen, so you can follow along there or here.
On Android
1. Export from My TimeBook
In My TimeBook:
- Tap the ⋮ menu in the top right, then Settings.
- Scroll down to Import/Export.
- Tap Export Data To CSV File.
My TimeBook saves the file to your phone's Downloads folder.
2. Send the file to DockBook
- Open your Files app and go to Downloads. The file's name starts with mytimebook.
- Press and hold the file to select it, then tap Share.
- Choose DockBook from the list. DockBook opens and reads the file on its own.
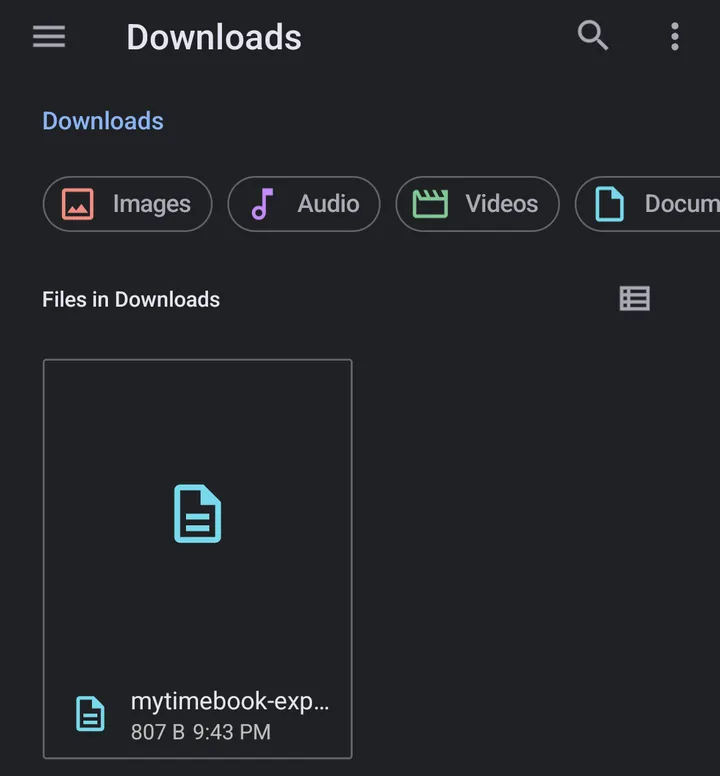
If sharing doesn't work on your phone, go back to the importer in DockBook and tap the link that says I already have my CSV, then choose it from Downloads.
That's the Android side. Skip the iPhone section and go to Check the preview and import below.
On iPhone
My TimeBook on iPhone doesn't save a file. It emails its backup as an attachment, using Apple's Mail app. If you already have an email account set up in Mail, this is quick. If you don't, there's one setup step first.
1. Check that Mail is set up
In My TimeBook, open Menu → BACKUP/RESTORE and tap BACKUP. If an email screen opens with a .csv file attached, you're set. Go to step 2.
No email screen? Add your email account to Apple's Mail app once. You don't have to switch email apps; this just lets My TimeBook send from your normal address:
- Open Settings → Mail → Accounts → Add Account.
- Pick your provider (Gmail, Outlook, iCloud and so on) and sign in.
Your iOS version may word these menus a little differently. If My TimeBook then says "No e-mail address found", set your address in My TimeBook under User Profile → E-mail.
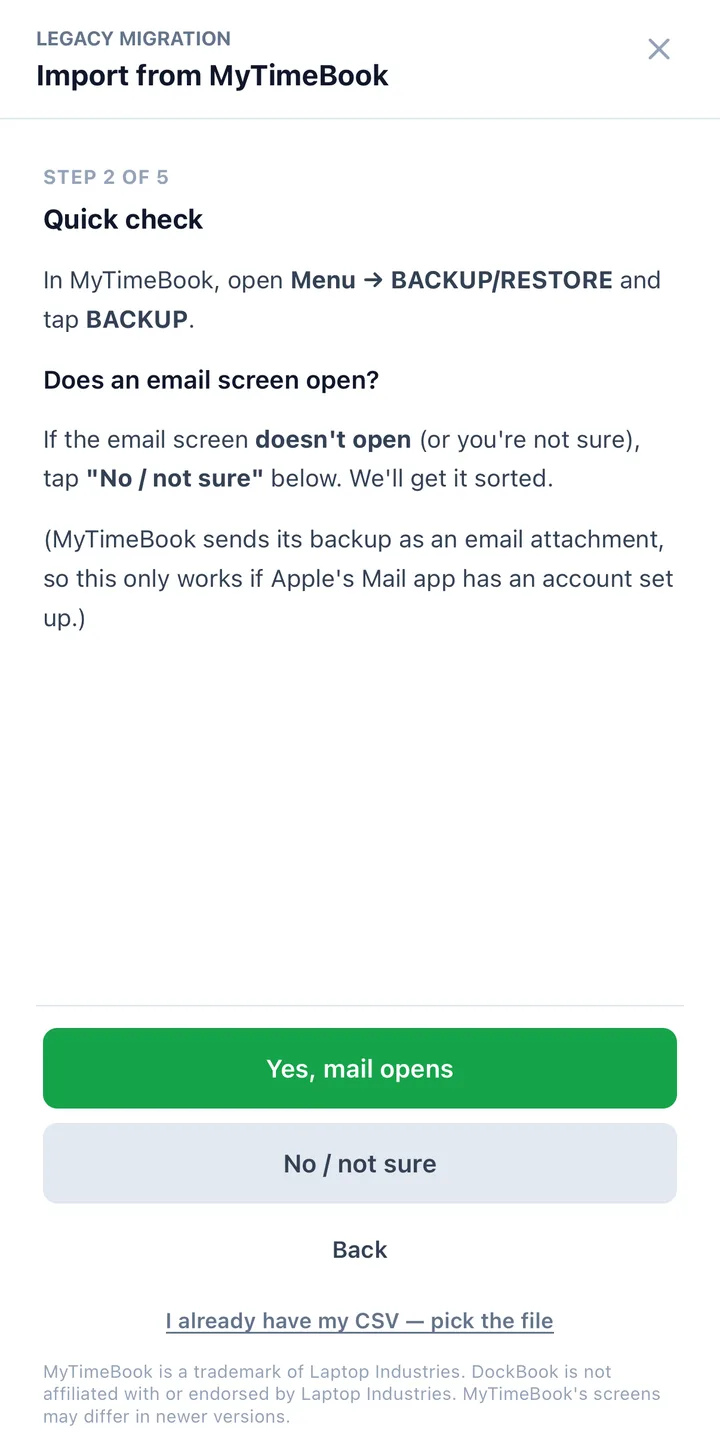
2. Email the backup to yourself
In My TimeBook, tap Menu → BACKUP/RESTORE → BACKUP. The email opens with the .csv file attached. Send it to yourself.
3. Open the attachment in DockBook
- On your iPhone, open the email you just sent.
- Tap the .csv attachment, then tap Share.
- Choose DockBook.
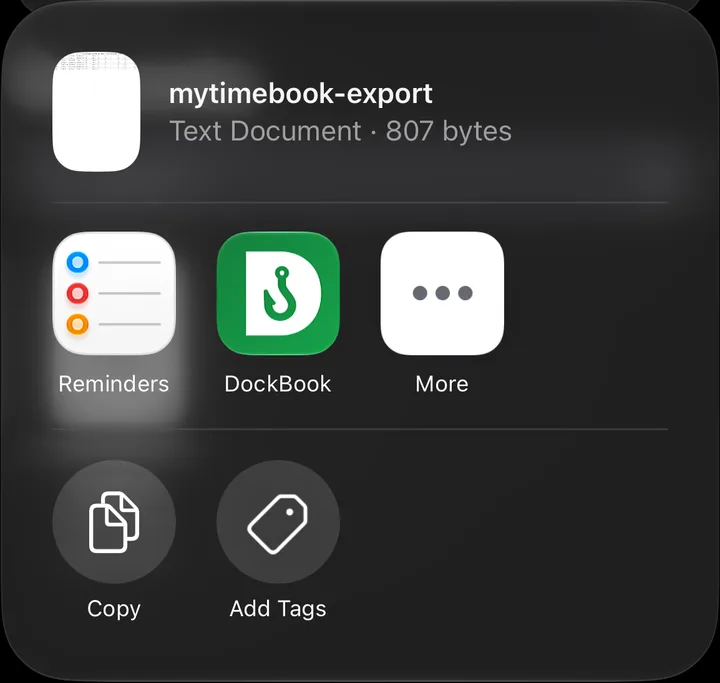
If DockBook doesn't open on its own, save the attachment with Save to Files, then go back to the importer in DockBook and tap the link that says I already have my CSV.
Check the preview and import
Before anything is saved, DockBook shows you what it found: how many shifts, the date range, and the first few rows. Shifts that are already in DockBook are skipped, and the preview tells you how many.
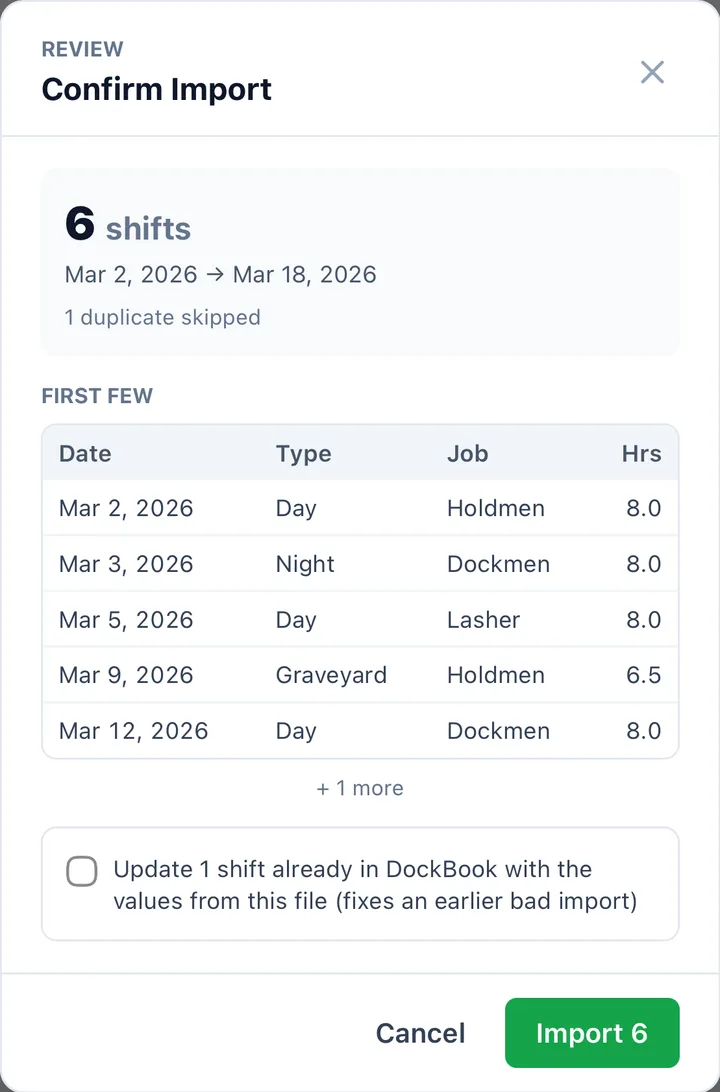
If everything looks right, tap Import. Your shifts land on the calendar with their dates, jobs, ships and hours, and your vacation days come across as vacation entries.
You'll sometimes see a box offering to update shifts that are already in DockBook. Leave it unticked unless you're re-importing to fix shifts that came in wrong the first time. Unticked, DockBook only adds what's new, so it's safe to run the import again later.
What you get once your history is in
Your old shifts now sit next to your new ones, so your hours, year-to-date and reports cover the whole record, not just the weeks since you switched. When a paystub looks off, you have years of your own book to check it against, not a few weeks. For how the two apps compare feature by feature, see DockBook vs My TimeBook.
If you're on the BCMEA side, your stat holiday and pension tools read from these same shifts. On the PMA side, PGP, welfare and pension do too.
A note on My TimeBook's screens
My TimeBook is a trademark of Laptop Industries. DockBook is not affiliated with or endorsed by Laptop Industries. The menu names above are the ones My TimeBook uses as of this writing, and newer versions may label them differently.
Stuck on a step, or did something not come across right? Email me and I'll help you sort it out.
Frequently asked
Do I have to be a Pro member to import from My TimeBook?
No. The importer lives in Reports & Data, which is free.
Will importing create duplicate shifts?
No. A shift already in DockBook for the same date and shift is skipped, and the preview tells you how many were skipped before anything is saved.
What comes across from My TimeBook?
Your shifts, with their dates, shift type, job, ship, location and hours. Vacation days come across as vacation entries.
Why is the iPhone process different from Android?
My TimeBook on Android saves its export to your Downloads folder. On iPhone it sends the export as an email attachment, so it needs Apple's Mail app set up with an account.
Can I run the import more than once?
Yes. Shifts already in DockBook are skipped, so running it again only adds what is new.
Have a question about this post or spot something to fix? Email me directly.